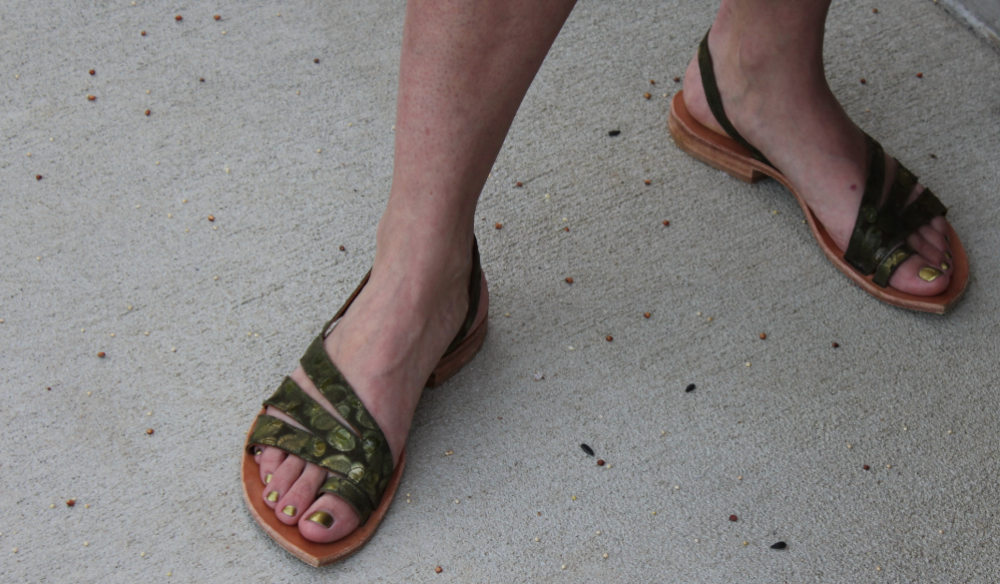
Yes, they are so.very.green. When I put them on, I feel like a resident of the Land of Oz!

They fit perfectly and are incredibly comfortable! Jessica Brommer is a fantastic teacher.

Yes, they are so.very.green. When I put them on, I feel like a resident of the Land of Oz!
They fit perfectly and are incredibly comfortable! Jessica Brommer is a fantastic teacher.
Almost there!

With a combination of cement and nails, I attached each layer around the last—first the lining, then the pale green, then the darker green. I don’t have a good photo from above, but it ends up looking like the crinkled toes and heels on the bottom of a ballet slipper. It’s kind of sweet.

After trimming off excess leather, I cemented in a metal shank, which will help keep the curvature in the sole (between the heel and the ball of the foot) rigid.
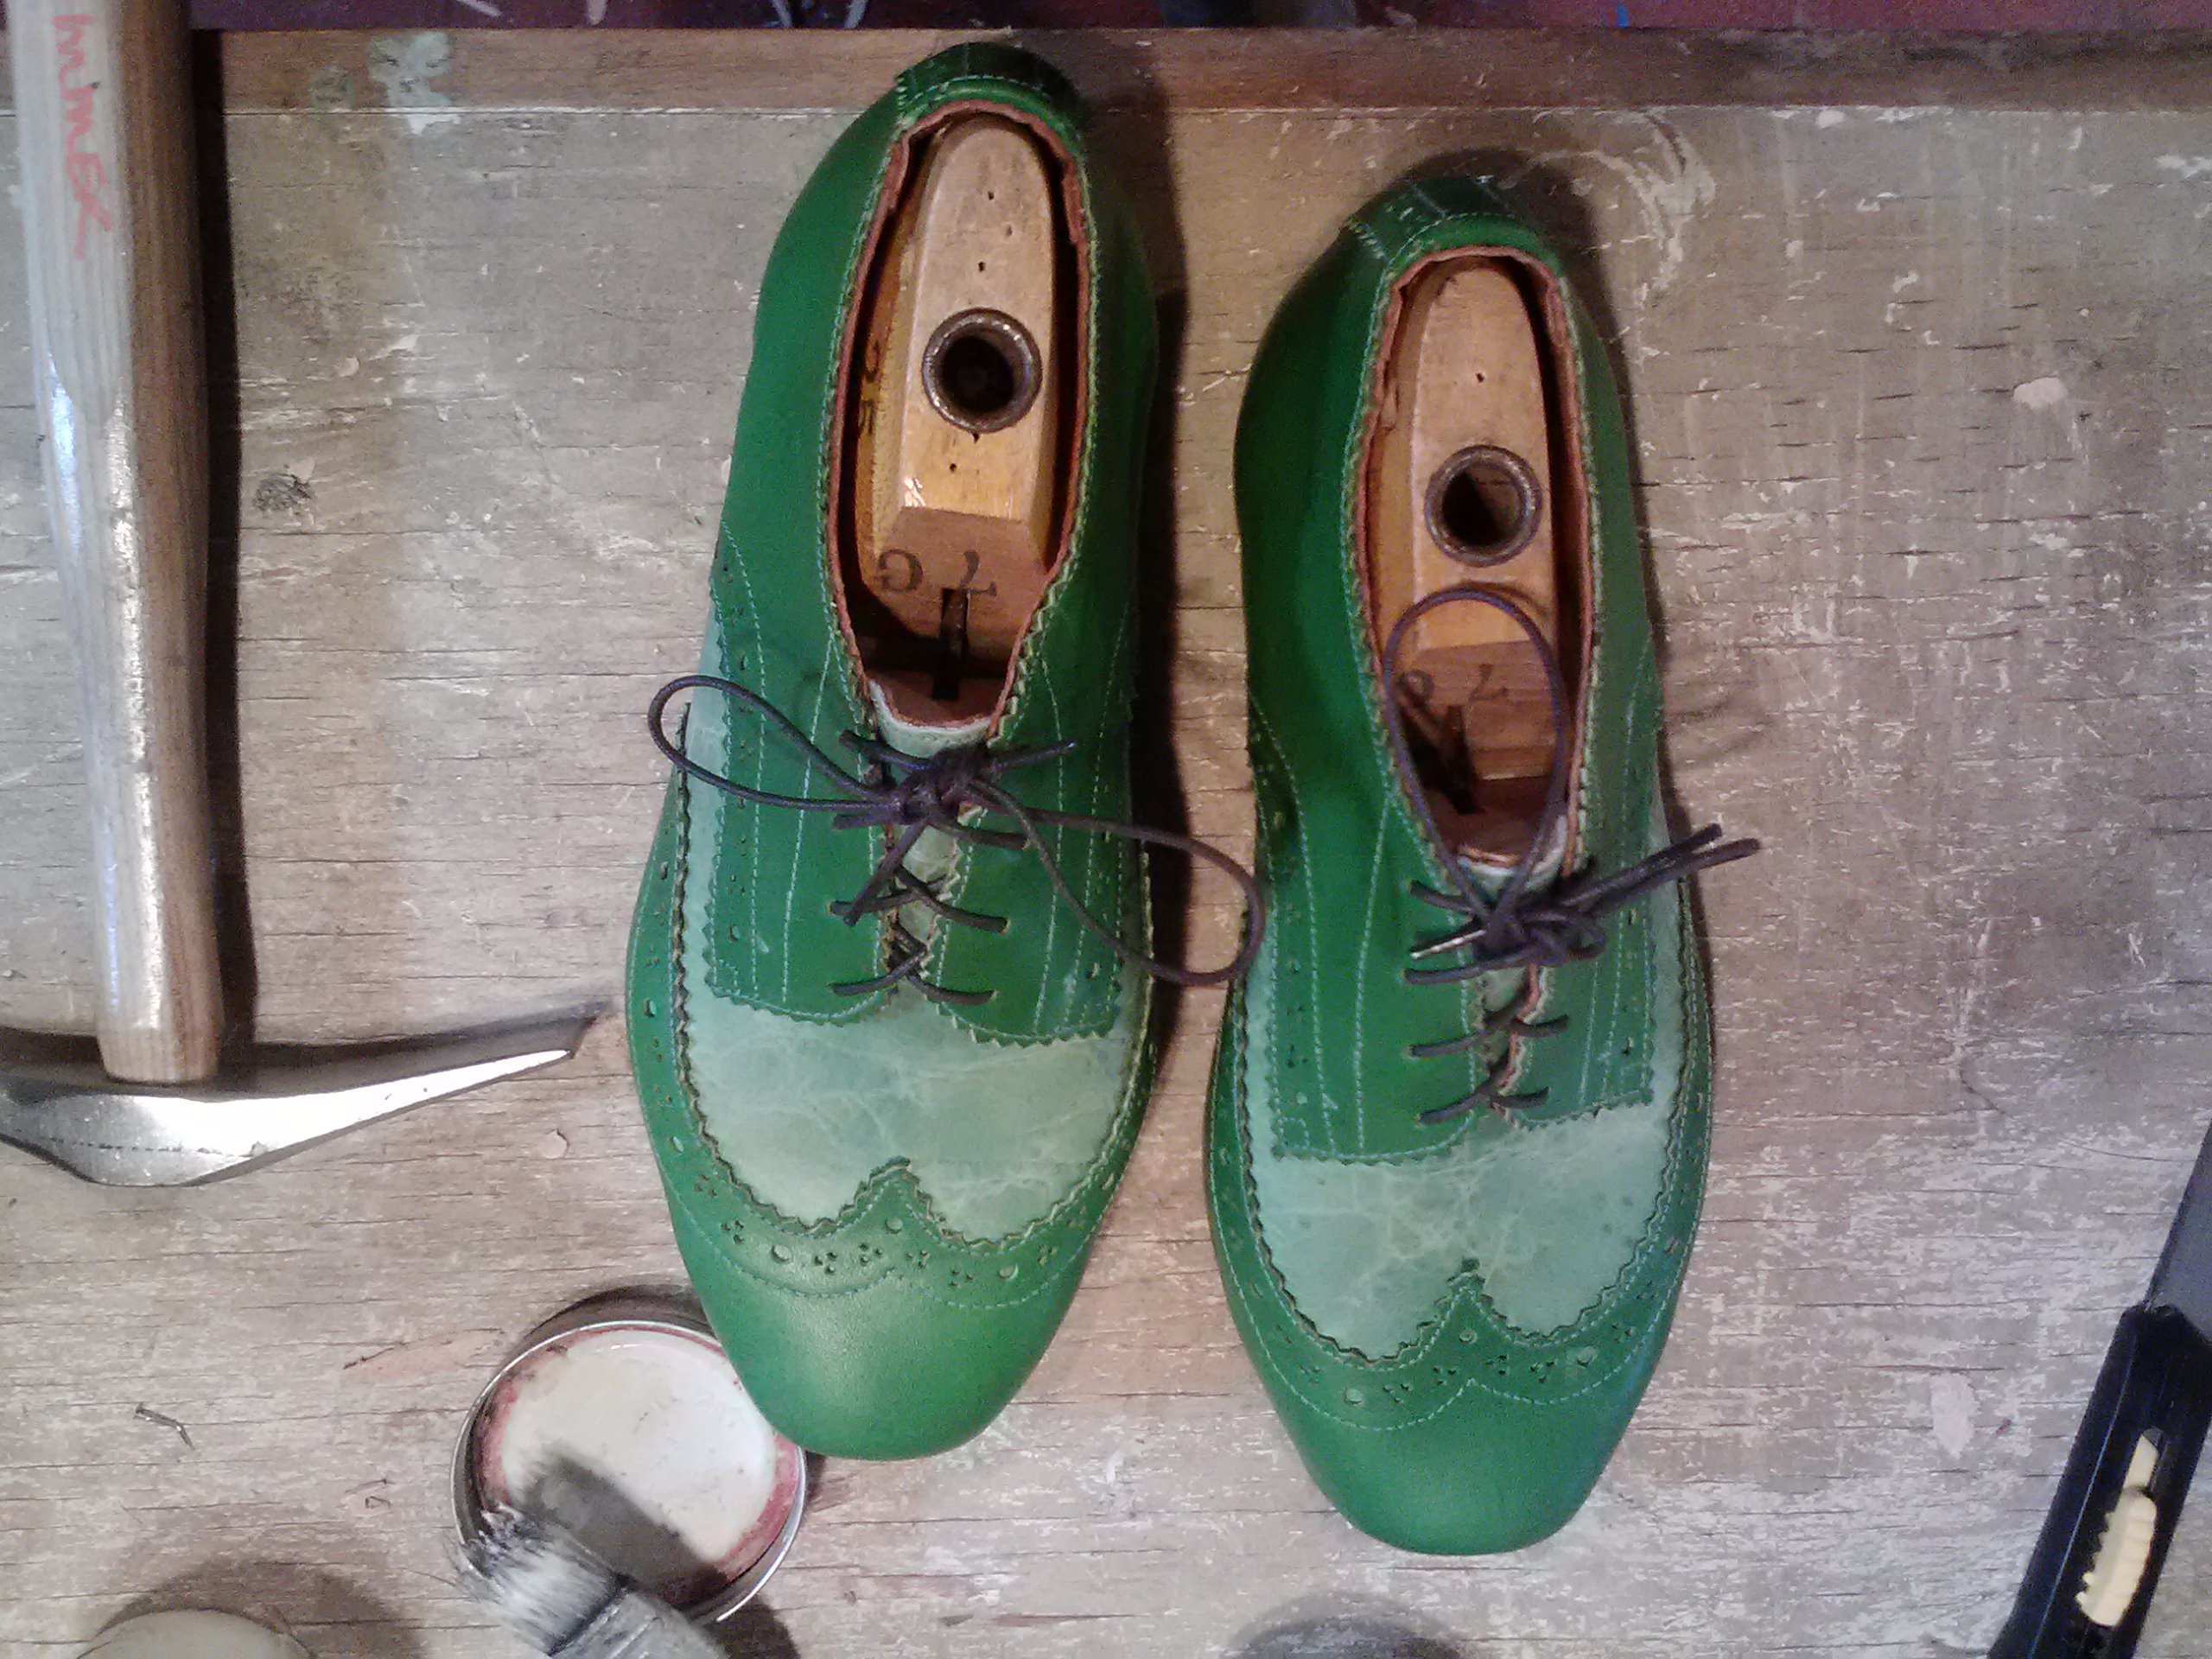
NOW it’s looking like a shoe! Oh, god, I can’t wait to finish these! We’ve got one day of class to go, and all I have left is to put on the soles and the heels and finish the edges. C’mon, c’mon, get here, Saturday!
I can’t get over how lucky I am.
First, I decided I wanted to keep making sandals, and I managed to meet people who helped me find supplies and equipment. When I ordered my sewing machine, the motor, machine and table weighed 75 pounds and arrived flat in two boxes without instructions, but I just happen to have a husband who used to be a millwright and who knows how to assemble industrial stuff. Not only that, but instead of doing it for me, he sat in a chair nearby and coached me, which meant I learned something. (In fact, let me just say here that my hubs has built me a workbench, converted a drill press into a buffer for me, helped me find a crank cutter, and been a cheerleader every step of the way. It’s clearly fated that I should make sandals, otherwise I wouldn’t have met my man, right?! Giggle.)
And now, a young shoe maker has moved to town and is teaching! Here’s what I’ve been doing under Jessica Brommer‘s tutelage.

All the outer pieces of one wingtip

This is roughly how they’ll go together. A glossary of terms will be helpful, so going left to right in the photo, you see: the strip that covers the seam along the back of the shoe; the back half of the shoe–in this case, the two kelly green pieces that look like a saddle–is called the quarter, and I haven’t finished the broguing (the punched holes) on those pieces yet; the front of the shoe is called the vamp–mine consists of the distressed light green piece with the kelly green wingtip appliqued atop it.

Big leap forward in time. I’ve finished the broguing on the quarters, stitched both quarters to each other at the back seam, and covered the back seam with the strip. I’ve stitched the wingtip to the vamp. I’ve also stitched the tongue to the lining. Finally, I’ve sandwiched one side of the vamp between one quarter (near the lacing holes) and stitched the quarter to the vamp.

I’ve sandwiched the other side of the vamp between the other quarter and stitched them. Sheesh, I look at this and it’s like some clown-shoe action. Buuuuut…

The next step will be to shape the upper around the last. Here’s a taste of what the finished shoe will look like! Eeee!
